How do I do this?

Step-by-step guides for wherever you are right now, whether that's your first kit, your first monotub, or a tub that just turned green.

Recent articles

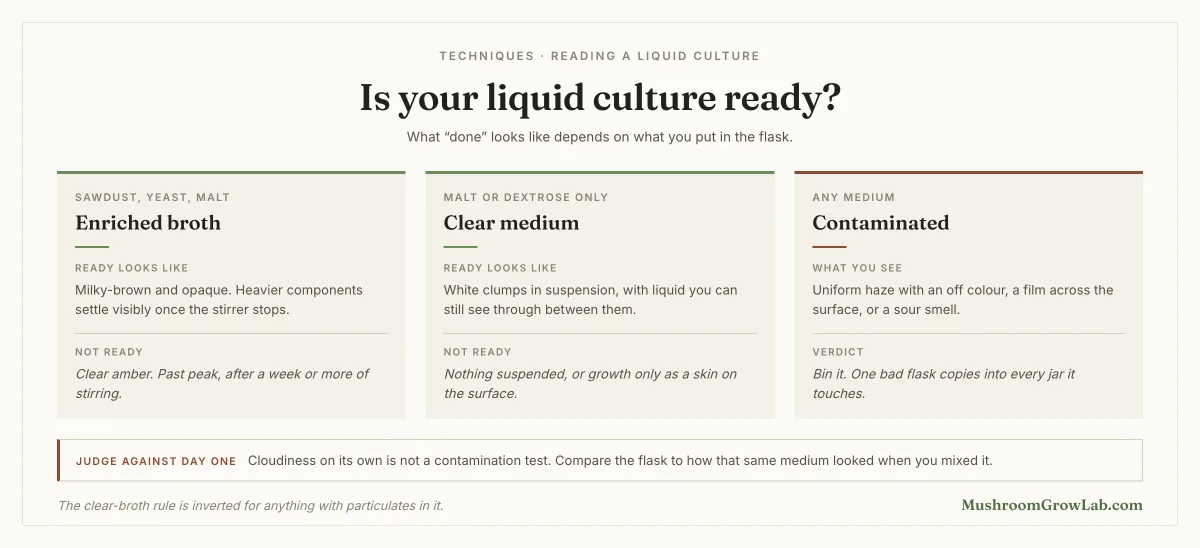
Three-panel guide to judging whether a liquid culture is ready, scoped to the medium in the flask. Enriched broth made with sawdust, yeast and malt: ready looks milky-brown and opaque, with heavier components settling visibly once the stirrer stops; clear amber means past peak, after a week or more of stirring. Clear medium made with malt or dextrose only: ready looks like white clumps in suspension with liquid you can still see through between them; not ready means nothing suspended, or growth only as a skin on the surface. Contaminated, in any medium: uniform haze with an off colour, a film across the surface, or a sour smell, and the verdict is to discard it because one bad flask copies into every jar it touches. Closing note: cloudiness on its own is not a contamination test, so compare the flask to how that same medium looked when you mixed it.

Techniques

Liquid Culture Recipe: What to Mix and How to Sterilize It
A sourced liquid culture recipe with exact amounts, how long to sterilize it, and how to tell a finished culture from a contaminated one.

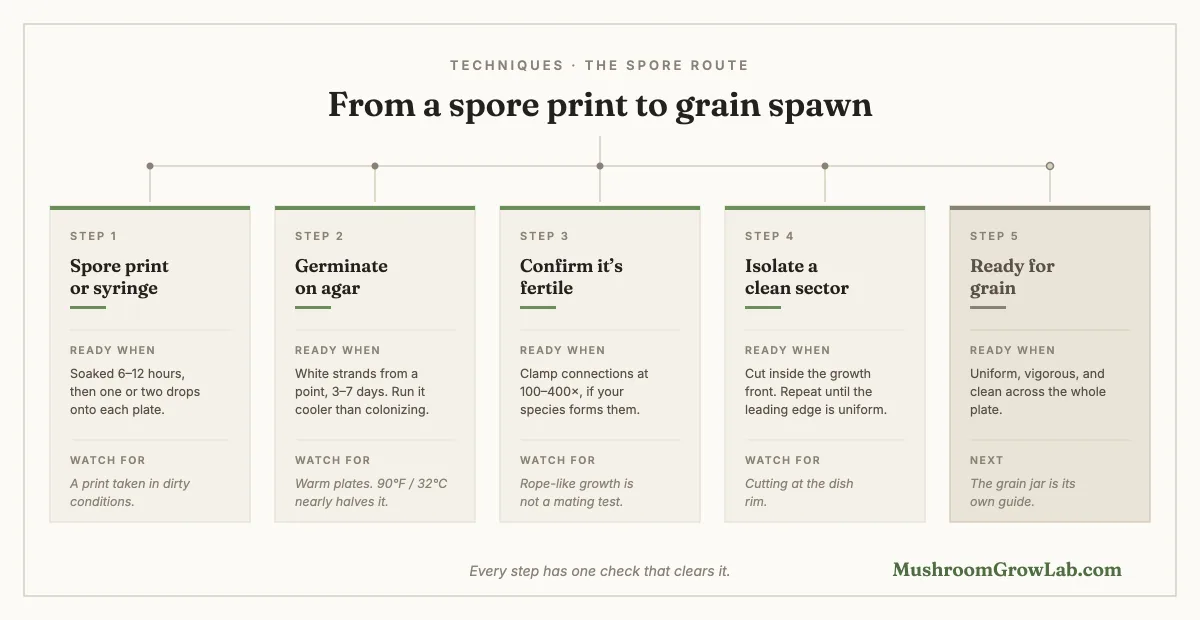
Five-stage pipeline from a spore print to grain spawn, with the check that clears each stage and the mistake to watch for. Step one, spore print or syringe: ready after a 6 to 12 hour soak and one or two drops per plate; watch for a print taken in dirty conditions. Step two, germinate on agar: ready when white strands radiate from a point in 3 to 7 days, run cooler than colonizing; watch for warm plates, since 90 degrees Fahrenheit or 32 Celsius nearly halves germination. Step three, confirm it's fertile: ready when clamp connections show at 100 to 400 times magnification, if the species forms them; watch for reading rope-like growth as a mating test. Step four, isolate a clean sector: cut inside the growth front and repeat until the leading edge is uniform; watch for cutting at the dish rim. Step five, greyed out, ready for grain: uniform, vigorous and clean across the whole plate, with the grain jar itself covered by a separate guide.

Techniques

How to Make Mushroom Spawn From Spores: Print to Grain
The spore route step by step — germinating on agar, telling a fertile culture from a sterile one, and knowing when it's ready to go to grain.

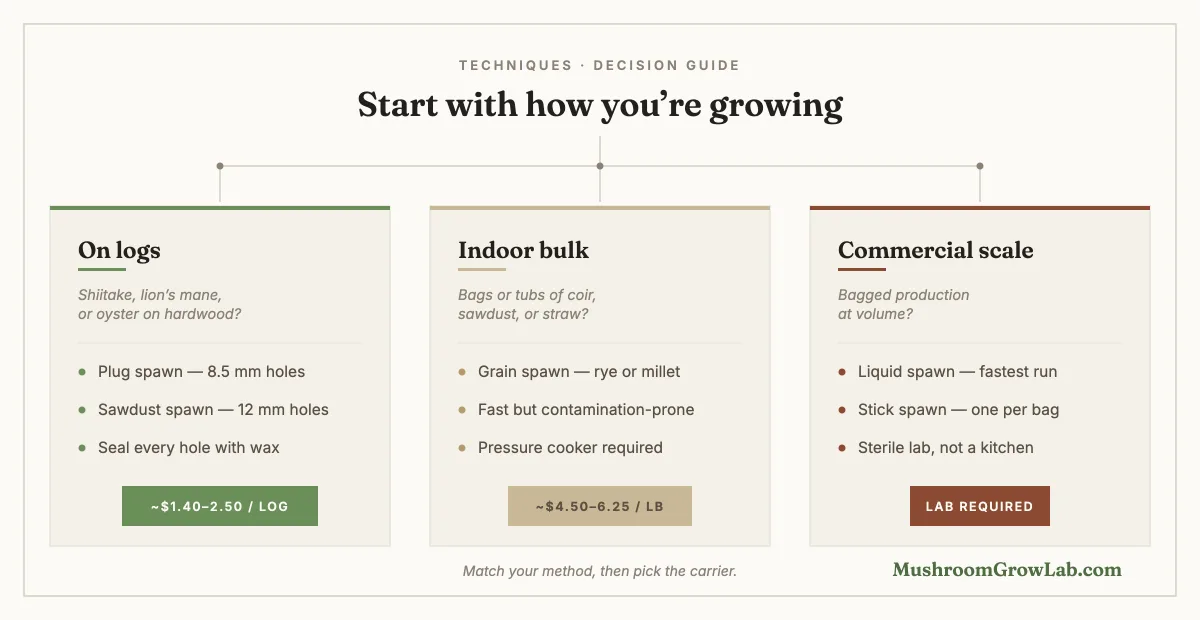
Decision guide matching growing method to spawn carrier: logs take plug or sawdust spawn at roughly $1.40 to $2.50 per log, indoor bulk takes grain spawn at roughly $4.50 to $6.25 per pound, and commercial bagged production uses liquid or stick spawn requiring a sterile lab.

Techniques

Mushroom Spawn: Types, How to Choose, and What It Costs
Grain, sawdust, plug, liquid, and stick spawn — what each carrier suits, how to tell good spawn from bad, and whether to buy or make your own.

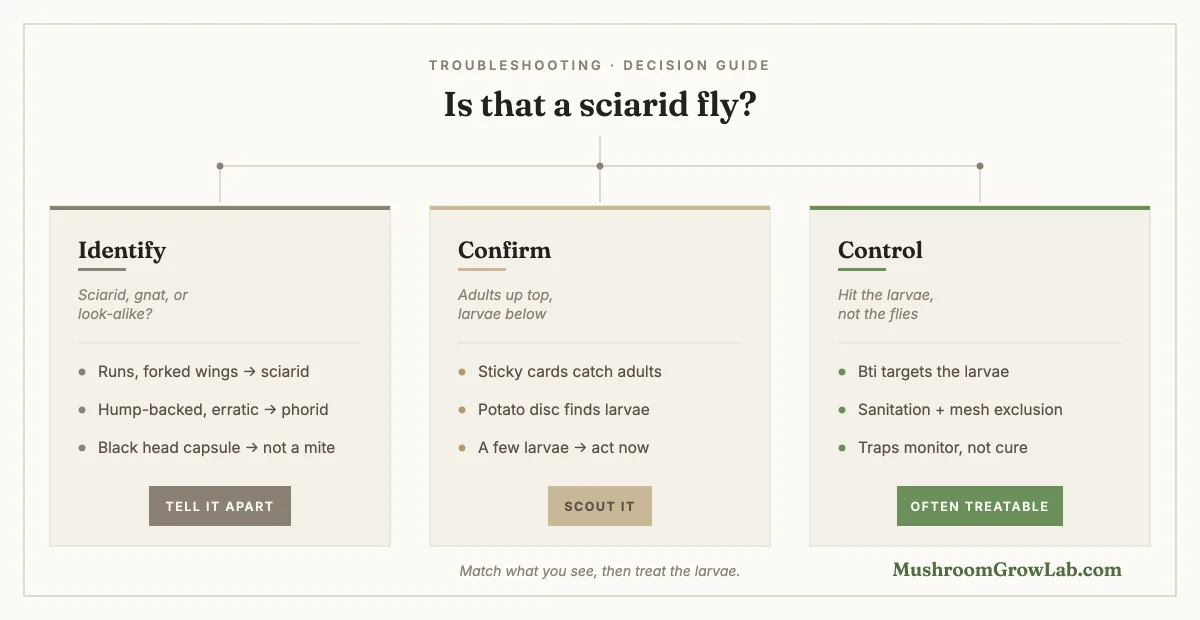
Decision chart for sciarid flies and fungus gnats in three steps. Identify: a fly that runs with forked wings is a sciarid, hump-backed and erratic is a phorid, and a larva with a black head capsule is a fly rather than a mite. Confirm: yellow sticky cards catch the adults and a potato disc finds the larvae. Control: Bti targets the larvae, sanitation plus fine-mesh exclusion prevent them, and sticky traps only monitor rather than cure.

Troubleshooting

Sciarid Flies and Fungus Gnats — Identify and Control Them in Mushroom Grows

How to identify sciarid flies and fungus gnats, tell the larvae from mites, and control an infestation with Bti, nematodes, and exclusion.

Troubleshooting

Mushroom Contamination Identification — The Non-Green, Non-Cobweb Catalog
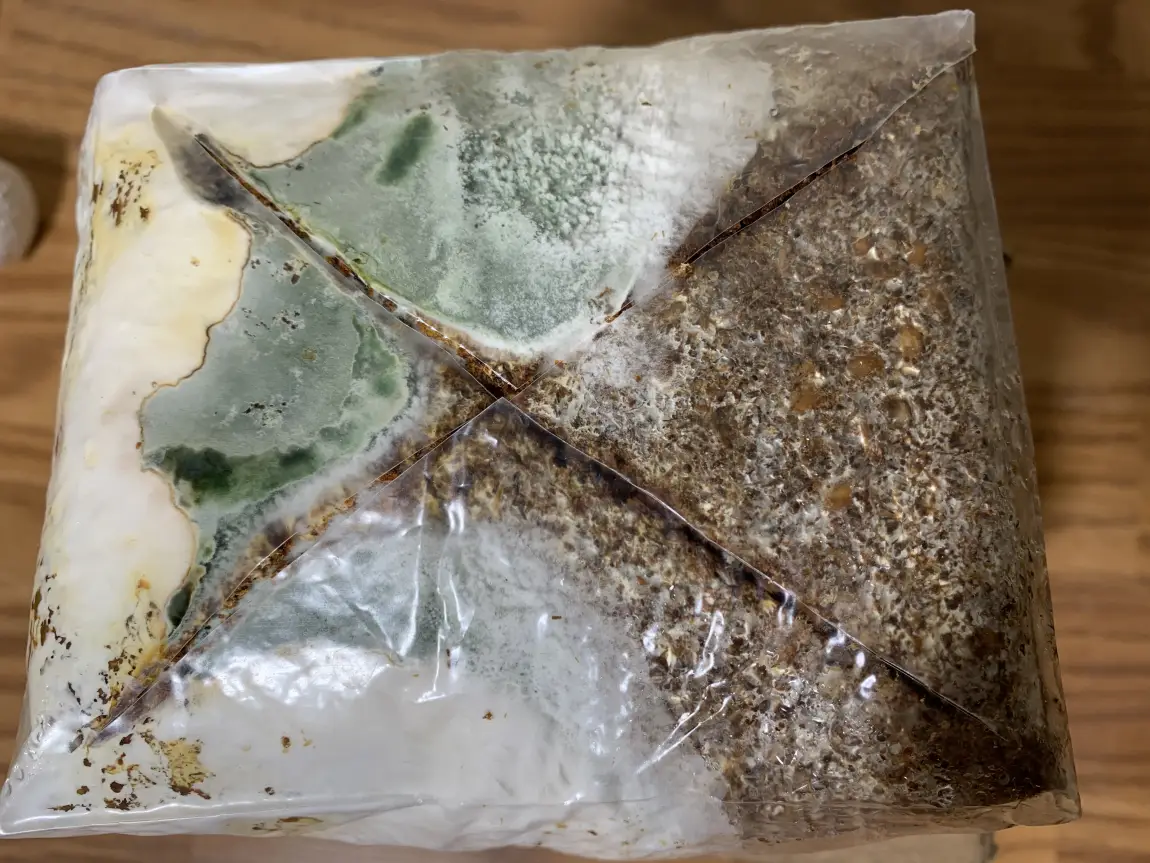
Identify non-green mushroom contamination by sight and smell: bacterial wet rot, pin mold, Aspergillus niger, yeast, and sour rot, plus when to scrap or save.

Top-down view of a blue oyster grain block in a plastic bag, the left half overtaken by forest-green Trichoderma sporulation with a white advancing frontier, the right half still brown, healthy substrate.

Troubleshooting

Green Mold on Mushrooms — Which One Is It and What to Do
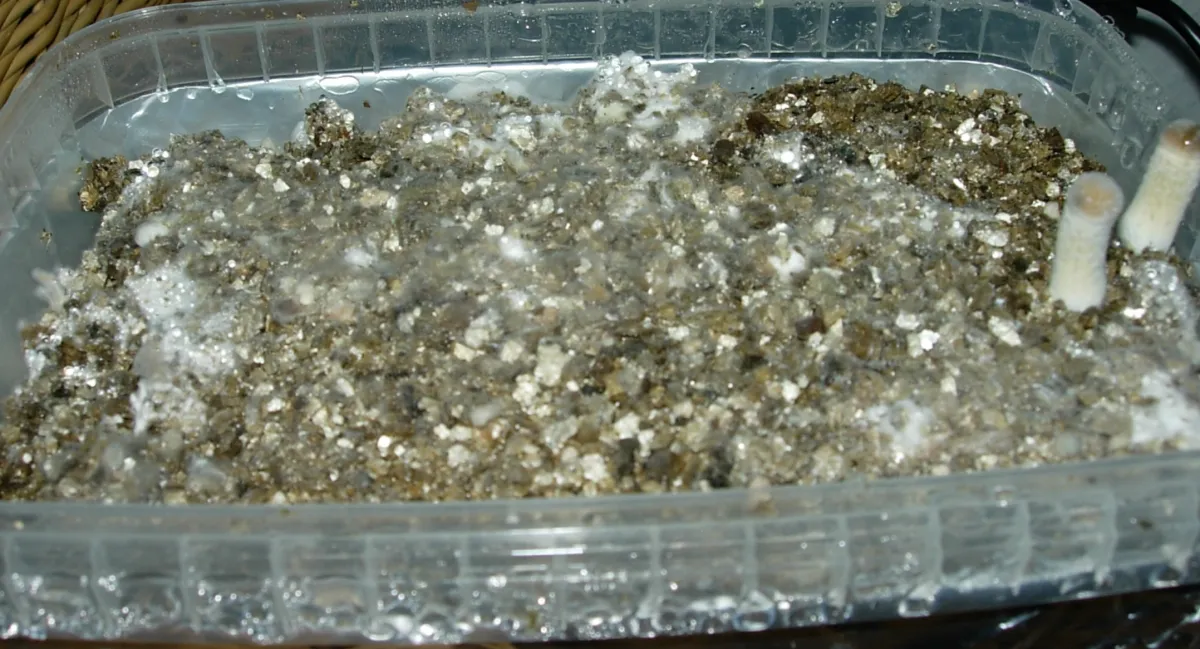
Green mold on a grow could be Trichoderma, Penicillium, Aspergillus, or Cladosporium. How to tell them apart, confirm the genus, and decide scrap or save.

Wispy grey-white cobweb mold spreading across the damp vermiculite casing of a clear plastic grow tub, with heavy condensation beading on the walls and two small mushroom pins at the right edge.

Troubleshooting

Cobweb Mold vs. Mycelium — How to Tell Them Apart and What to Do
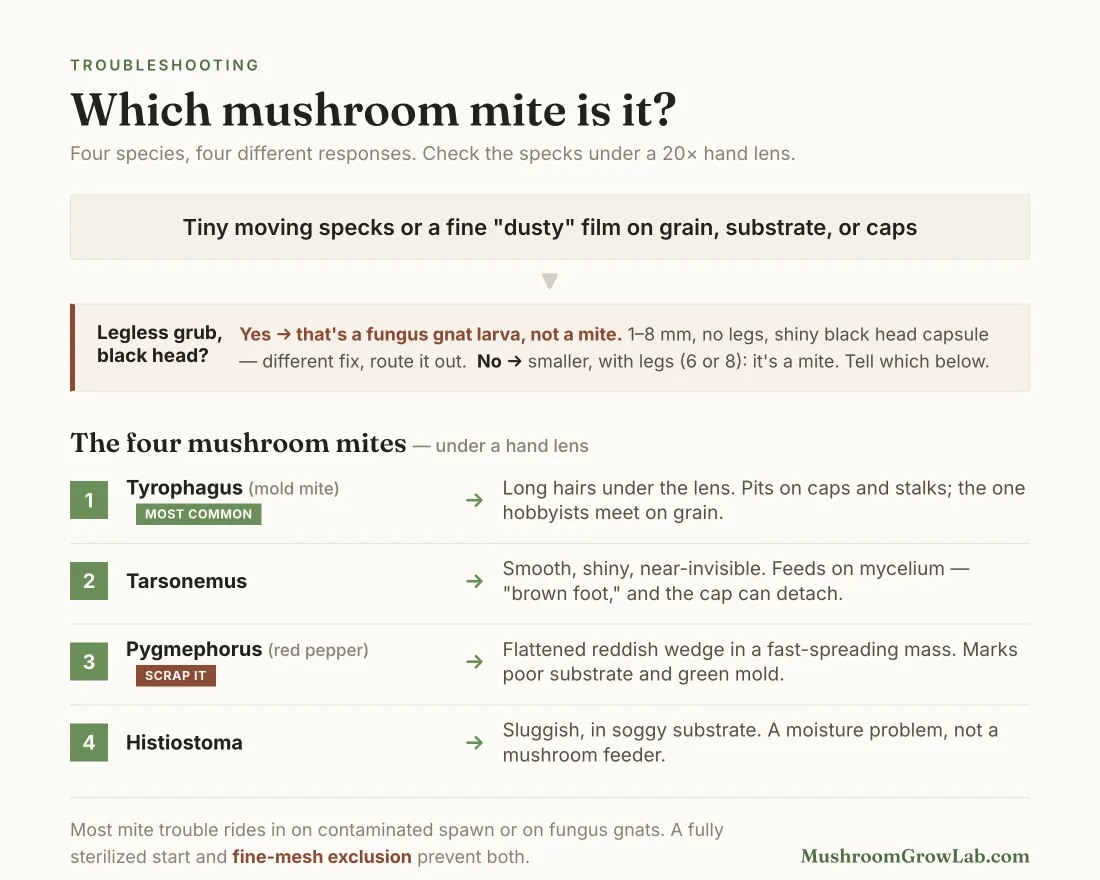
Cobweb mold looks a lot like healthy mycelium at first. How to tell them apart, confirm it with the peroxide test, and stop it before it spreads.

Decision chart for identifying mushroom mites: from tiny moving specks or a dusty film, first rule out fungus gnat larvae (1–8 mm, legless, shiny black head capsule), then tell the four mites apart under a hand lens — Tyrophagus mold mite (long hairs, pits on caps, most common), Tarsonemus (smooth and shiny, causes brown foot), Pygmephorus red pepper mite (flattened reddish wedge, a signal to scrap the grow over poor substrate and green mold), and Histiostoma (sluggish, in soggy substrate, a moisture problem).

Troubleshooting

Mushroom Mites: Identification, Damage, and What to Do
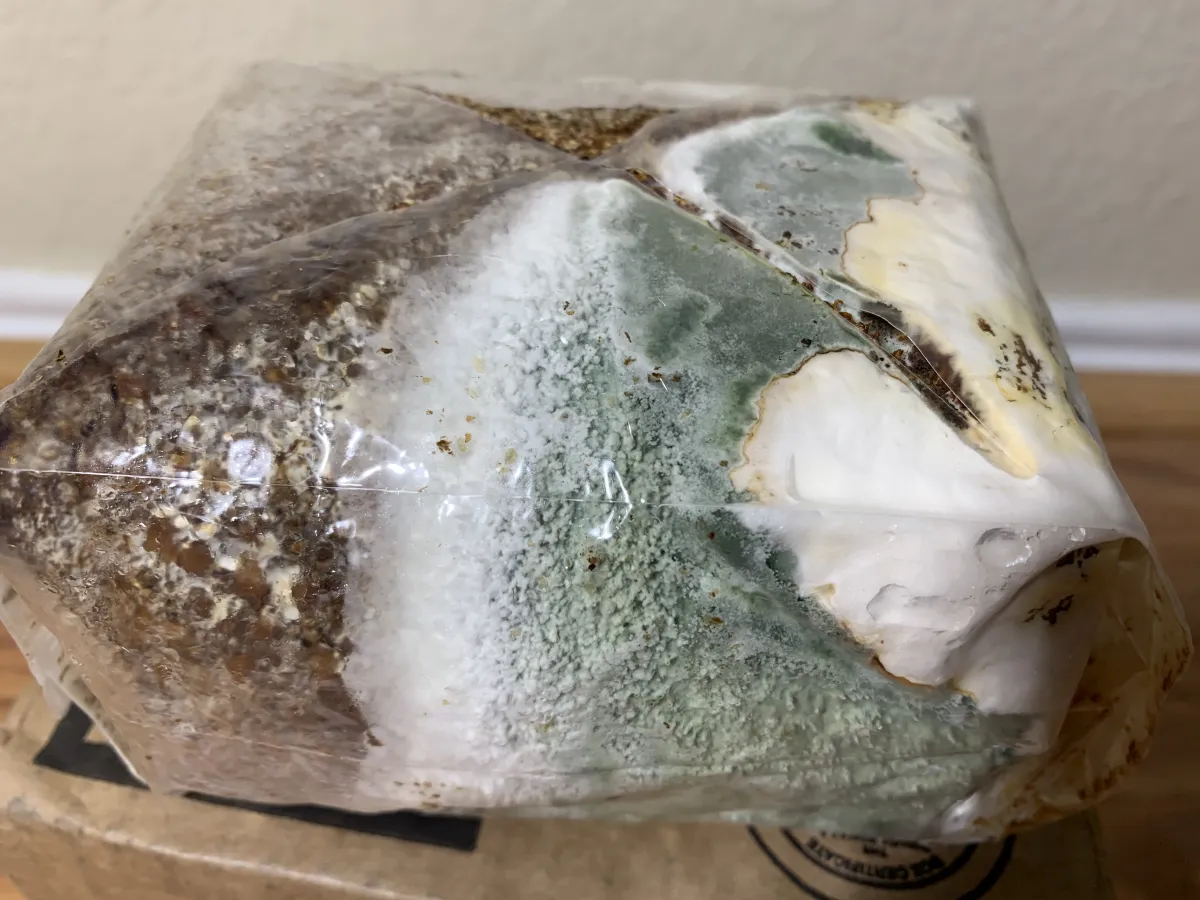
The four mushroom mites, how to tell them apart under a hand lens, how to separate them from fungus gnats, and what actually controls an outbreak.

Trichoderma green mold sporulating across a blue oyster fruiting block, with a fuzzy white advancing edge where it overtakes the mushroom mycelium.

Troubleshooting

Trichoderma Identification — Spotting and Stopping Green Mold

How to identify Trichoderma green mold at every stage, confirm it, and decide whether to save or scrap the grow, plus prevention that actually holds.