Techniques
How to Make Mushroom Spawn From Spores: Print to Grain
Published August 1, 2026 · By MushroomGrowLab
Contents
You have a spore print or a syringe, and you want jars of grain spawn at the other end. The path between them runs through agar, and it runs through agar for a reason that has nothing to do with fussiness: a spore is not a small culture. It is half of one.
This guide covers the origin half of that pipeline, from the print in your hand to a clean, vigorous culture that is ready to inoculate grain. Where the grain jars themselves come from is a separate job with its own equipment and timings, and we’ll point you at it when you get there.
What starting from spores actually gets you#
Spores are the product of sexual recombination, so every spore in a print carries a different shuffle of the parent’s genetics. A print is not a strain. It is a few million lottery tickets, and the culture you eventually grow out is whichever one you happened to pick and keep.
That cuts both ways. It’s why spore work is how new strains get found and how growers adapt a species to their own conditions. It’s also why a spore-started culture is unpredictable in vigor, yield, and shape until you’ve isolated one individual and tested it. A tissue clone or a purchased culture skips the lottery entirely, which is usually what you want if you just need a crop.
Spores do keep, though, and that is their practical advantage. They stay viable for weeks to months after the parent mushroom has rotted away, where a tissue clone has to be taken within a day or two of picking. If the mushroom you want is a specimen you found rather than one you can buy, spores are often the only route left.
What you’ll need#
- A spore print or spore syringe. Prints keep longer and are easy to take yourself. Syringes are ready to squirt but harder to judge for contamination.
- Poured agar plates. Potato dextrose agar is the workhorse. A Swedish wild-strain isolation study used 4 g/L potato extract, 20 g/L dextrose, and 15 g/L agar, with antibiotics added to hold back bacteria. Malt extract agar is the other common choice.
- Sterile water, pressure-sterilized along with whatever you’re using to move it.
- A clean-air workspace. A still-air box is enough for plate work and costs almost nothing to build. A flow hood makes every transfer faster and more forgiving.
- A pressure cooker. Agar and water both have to be sterilized outright, not pasteurized.
- A scalpel and a flame.
Spore prints and syringes are stocked by most of the larger suppliers, including North Spore, Out-Grow, and Fungi Ally. If you’re taking your own print, take it under the cleanest conditions you can manage, because everything that lands on the paper comes with you into the next step.
Making a spore syringe from a print#
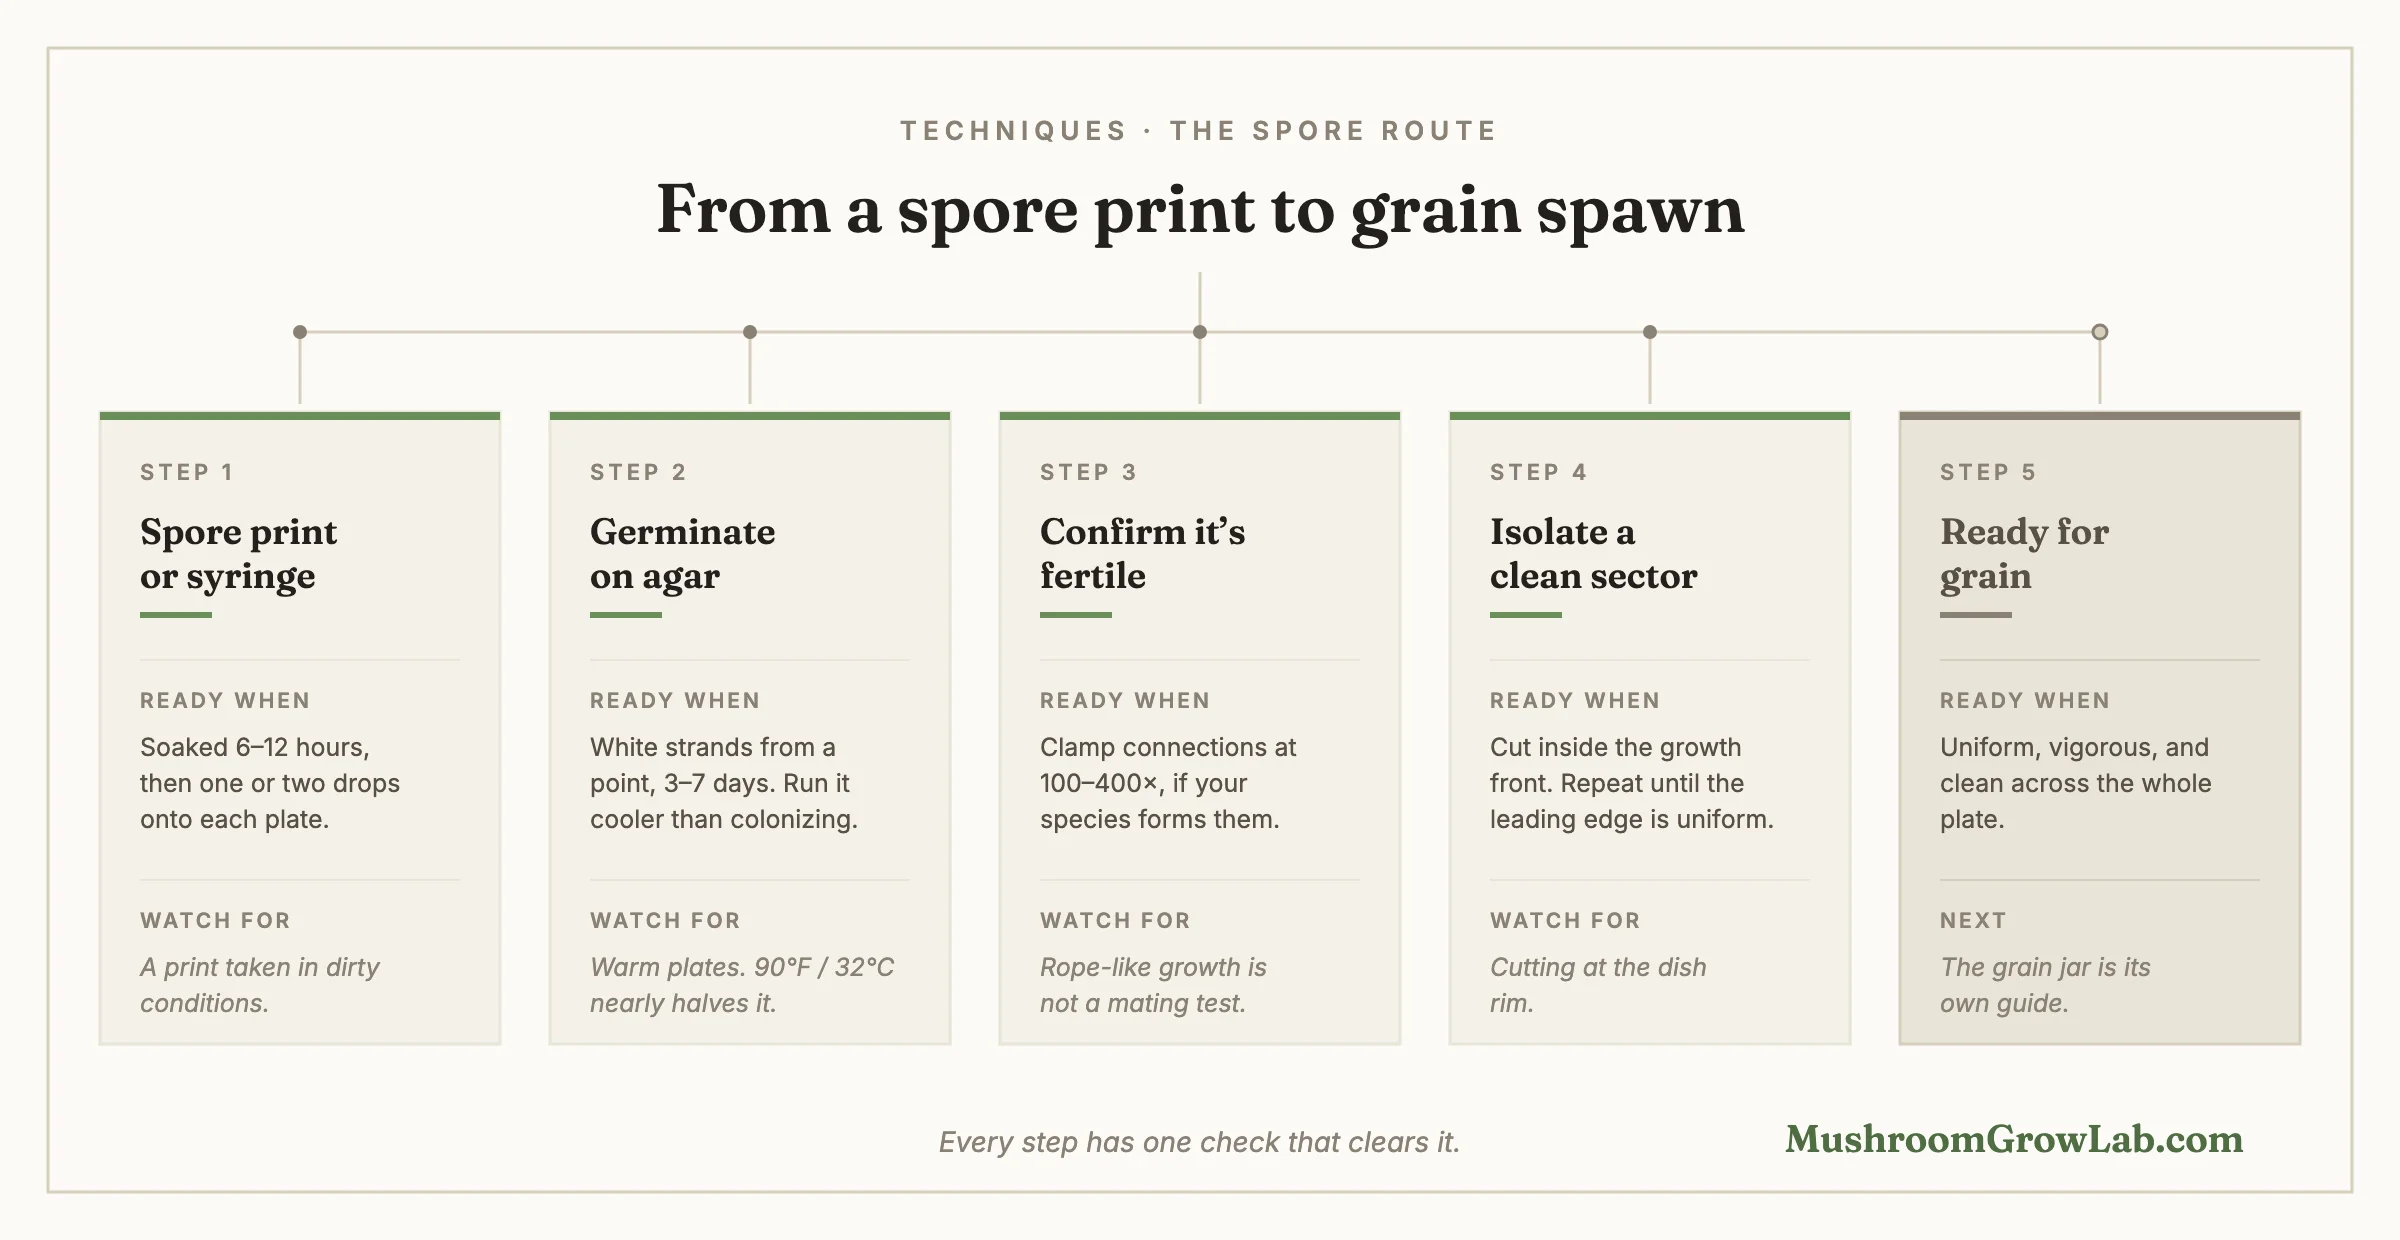
Sterilize your dropper or syringe together with the water for 30 minutes at 15 psi. Touch spores from the print onto a flame-sterilized scalpel, insert it into the sterile water, seal, and leave it to stand for 6 to 12 hours. Those figures are from Stamets and Chilton’s The Mushroom Cultivator.
That soak is doing real work. Spores that have dried and collapsed at their centers germinate poorly, and rehydrating them is what brings them back. Older prints need longer.
Draw up several milliliters, then inoculate each plate with one or two drops. Not more. You want spores landing far enough apart to see individually, not a lawn.
If the print was taken in unsanitary conditions, the technique favors contaminant spores just as efficiently as mushroom spores. A syringe cannot clean up a bad print.
Germinating the spores#
Spores need food to germinate, not just moisture. Work on Agaricus bisporus found that its spores failed to germinate on starvation agar entirely and required both a carbon and a nitrogen source before they would move. That’s the whole reason for germinating on nutrient agar rather than in plain sterile water.
Run the plates cooler than you’d run a colonizing jar. In the clearest temperature comparison published on basidiospore germination, Dulay and colleagues tested Lentinus tigrinus at three temperatures in liquid:
| Incubation | Germination at 7 h | Germination at 10 h |
|---|---|---|
| 90°F / 32°C | 50.0% | 54.0% |
| 73°F / 23°C | 86.0% | 91.3% |
| 48°F / 9°C | 67.3% | 73.3% |
The finding the authors drew out is the useful one: the best temperature for germinating spores is lower than the best temperature for running mycelium. Warm is not better at this stage. At 90°F / 32°C germination roughly halved. The same paper puts oyster spore germination in the 75–82°F / 24–28°C band, which lands in the same place.
On agar, expect visible growth in three to seven days: thread-like strands radiating from a point, grey and diffuse at first, whitening as they spread. Older spores are slower; three-week-old A. bisporus spores took four to five days. If nothing has moved by day ten, the spores were probably too old or too dry.
Contamination shows up on the same schedule as germination, which is exactly why this step happens on a plate where you can see it.
Telling a fertile culture from a sterile one#
A germinated spore produces a monokaryon, mycelium with one nucleus per cell, carrying half the genetics. It grows, but it cannot fruit. Two compatible monokaryons have to meet and fuse into a dikaryon before anything will make a mushroom.
In the species most home growers work with, a monokaryon’s mating identity is written at two separate places in its genome, labelled A and B. Think of them as two fields on an ID badge: one monokaryon reads A1/B1, another reads A2/B2.
Two monokaryons fuse only if they carry different versions at A and different versions at B. Sharing either field blocks it. Difference is the requirement rather than a match, which is the opposite of how compatibility usually works and the part that catches people out.
A parent fruitbody holds two nuclei, and meiosis shuffles those two fields independently, so its spores come out in four mating types. Hold one spore fixed. If it germinated as A1/B1, here is everything it can meet:
| It meets | Shares with it | Will they mate? |
|---|---|---|
| A1/B1 | A and B | No |
| A1/B2 | A | No |
| A2/B1 | B | No |
| A2/B2 | nothing | Yes |
One in four. That’s plenty when a syringe puts thousands of spores on a plate and they sort it out among themselves, and it’s why multispore works at all. It’s much less forgiving when you’re deliberately crossing two isolates you picked by hand, where three attempts in four will just sit there.
The reliable test is clamp connections. These are microscopic bridges between adjoining cells, found only in dikaryotic mycelium, and visible with a light microscope at 100–400×.
Two exceptions matter, and the button mushroom is both of them. Not every species forms clamps — button mushrooms don’t, while most Psilocybe and Panaeolus species do. A. bisporus is also bipolar and secondarily homothallic, with most of its basidia producing two spores rather than four, so a single spore can give you a fertile culture without ever finding a partner. Any blanket claim that two spores must always meet is wrong for the most cultivated mushroom in the world.
Growth habit is not a mating test. Dikaryons do tend to run faster and look more vigorous, so vigor is a real signal. But rope-like rhizomorphic growth versus fluffy tomentose growth is a sectoring phenomenon, not a ploidy readout — Stamets and Chilton document a single wedge of mycelium producing both types in one dish, and attribute sector type to genetics, nutrition, and age of the culture. Growers still chase rhizomorphic sectors, and they’re right to. Rhizomorphic mycelium forms more primordia and yields more mushrooms, which makes it a fruiting bet rather than proof of mating.
Isolating a clean, vigorous sector#
Once you have growth worth keeping, the job is to get one individual onto a clean plate and away from its neighbours.
- Flame the scalpel and let it cool.
- Cut inside the growth front, not at the edge. Peripheral mycelium at the dish rim collects contaminant spores, and anything you carry from there rides along into everything downstream.
- Move the piece to a fresh plate. Roughly 5 × 5 mm cut from the growth front is a working size. For the cleanest possible culture, go finer still and transfer a single hyphal tip from the leading edge.
- Repeat until the leading edge looks uniform. How many rounds that takes depends on what you started with. Judge it by the plate, not by a count.
- Check for clamps if your species forms them, before you commit the culture to anything expensive.
Between rounds, watch the plate for anything that isn’t your mycelium. Colours, sharp-edged colonies, wet patches, and sour smells are all worth investigating rather than transferring past — our contamination identification guide covers what the common ones actually are.
When the culture is ready for grain#
A culture is ready to advance when three things are true at once. The leading edge is uniform, with no sectoring you didn’t choose. Growth is vigorous, filling the plate at a steady rate rather than crawling. And the plate is visibly clean across its whole surface, not just near the middle.
Species timing varies enough that a fixed number would mislead you. Judge the plate.
From there the culture goes onto sterilized grain, and that step is a page of its own — grain selection, hydration, sterilization, and the transfer itself all have parameters worth getting right, and it’s where most first attempts actually fail. Our master grain jar guide covers it (coming soon). In the meantime, the spawn overview maps the whole pipeline and where each stage sits.
If you’d rather expand the culture in liquid before it touches grain, that’s a legitimate route and a faster one. Our liquid culture recipe covers the broth, the sterilization time, and how to tell when it’s ready.
Tips and common mistakes#
Germinating at colonization temperature. The single most common thermal mistake. The incubator setting that suits a running grain jar is measurably wrong for a germinating plate, and you’ll read the poor germination as bad spores.
Going from syringe straight to bulk substrate. You’re asking half-genetics mycelium to outcompete established bacteria and moulds in a substrate that was only pasteurized, introduced at a handful of points. Every one of those disadvantages reverses if you germinate on agar first.
Treating a fluffy culture as a failed one. Sector type is not ploidy. Check for clamps before you bin a plate that’s growing fine but doesn’t look the way you expected.
Skipping the rehydration soak on an old print. Dried, collapsed spores germinate badly, and six to twelve hours in sterile water is the cheapest step in the whole process.
Storing prints somewhere warm. Spore longevity splits sharply by colour — dark-coloured basidiospores stayed viable at least 2.8 years in one study of saprotrophic species, while light-coloured spores lasted much less. Cold storage is doing measurable biochemical work, not just keeping things tidy: A. bisporus spores held at 36°F / 2°C kept their viability, while warmer storage lost it. Dry, dark, cold, and sealed.
Transferring from the dish rim. Cut inside the front. This one mistake seeds contamination into every generation that follows.
Related guides#
- Mushroom spawn: types, how to choose, and what it costs — where this fits in the wider pipeline, and how the finished spawn gets used.
- Mushroom substrate: recipes, materials, and how to pick one — what your spawn eventually goes into.
- Contamination identification — what the colours and textures on a failing plate actually are.
- Still-air boxes and pressure cookers — the two pieces of hardware that decide whether plate work is realistic at home.
- Oyster, shiitake, and lion’s mane — species pages with the germination and fruiting quirks specific to each.
- Substrate calculator — once you have spawn, this sizes the bulk substrate it goes into.
Newsletter
Grow better mushrooms