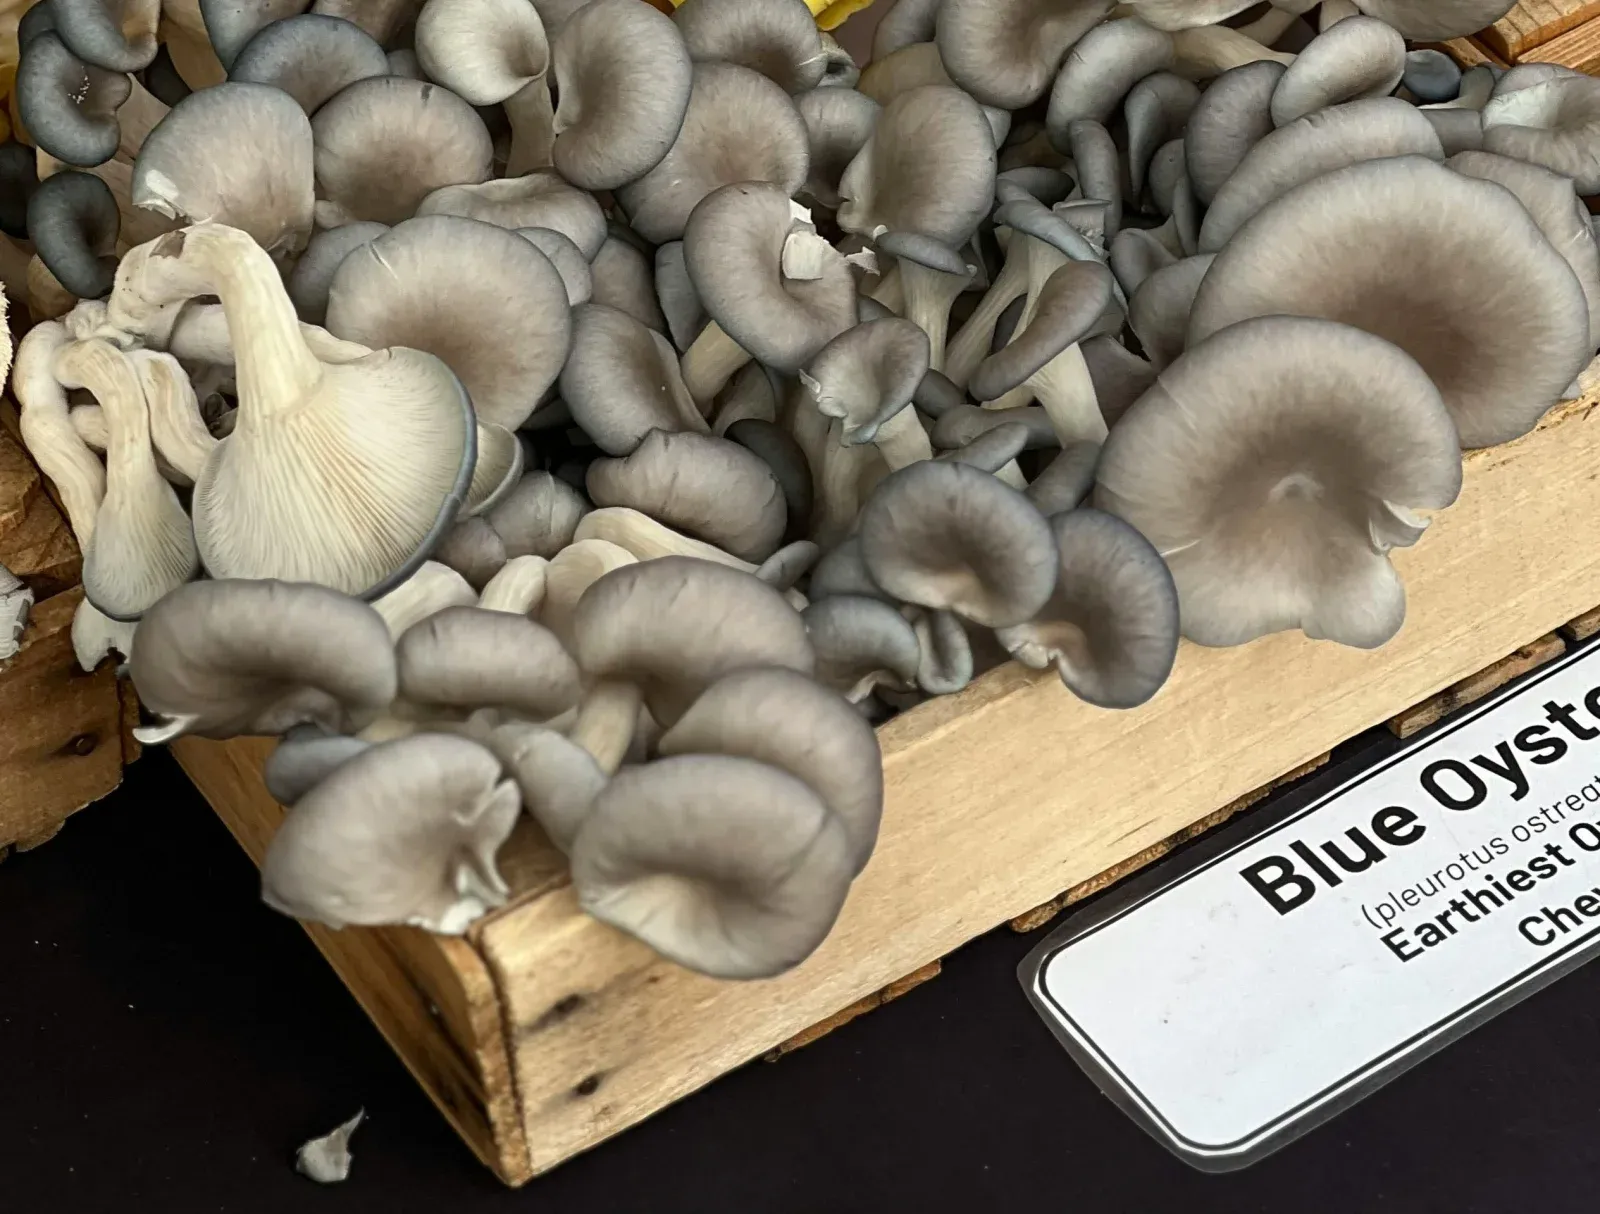
Blue Oyster
Pleurotus ostreatus var. columbinus
Also known as: Blue oyster mushroom, Pleurotus columbinus, Cold blue oyster, Warm blue oyster, Tree oyster
Quick Reference
- Difficulty
- Beginner (1/5)
- Days to harvest
- 4–10 days
- Yield per 5lb block
- 1.5–2.5 lbs per 5 lb block (2–3 flushes)
- Fruiting temp
- 55–75°F
- Humidity
- 85–95%
- Use
- Culinary + Medicinal
- Best substrates
- Wheat straw, Master's Mix (hardwood + soy hull pellets), Supplemented hardwood sawdust, Coffee grounds, Cardboard
- Growing methods
- kit · bag · bucket · log · outdoor-bed
Contents
Why grow blue oysters#
Blue oysters are the most forgiving mushroom you can cultivate at home. They colonize aggressively, tolerate temperature swings, fruit on almost any cellulose substrate, and reward you with dense clusters of cobalt-tinged caps within two weeks of pinning. If you’ve never grown a mushroom before, this is the species we’d start you on.
The other thing that makes them beginner-friendly is speed. From opening a kit to harvesting your first flush takes about three weeks, which is short enough to keep you engaged through the patience-testing parts of the process. By the time most other species have finished colonizing, blue oysters are already on their second flush.
One honest caveat: blue oysters are heavy spore producers, and a fully-mature flush in a poorly ventilated space can irritate sensitive lungs. For a single block on a kitchen counter the risk is minimal — for a sealed grow tent or any setup where flushes are left to fully open and shed, it’s worth taking basic precautions. We cover the specifics in Harvest and yield and Common problems below.
Substrates#
Blue oysters will eat almost anything cellulose-based, which is part of why they’re so forgiving. The trade-off is yield — the substrate you pick determines how much you actually harvest, not whether you harvest at all.
Wheat straw is the workhorse and the most-cited substrate in both university extension publications and commercial production literature. It’s cheap, easy to pasteurize with hot water or hydrated lime, and produces reliably for the bucket and bag methods. For maximum yield in a sterilized bag setup, Master’s Mix — 50% hardwood fuel pellets, 50% soy hull pellets — is the standard upgrade. It pushes biological efficiency well above straw and produces denser, meatier clusters.
- Wheat straw — the workhorse. Cheap, easy to prepare, and the most-validated substrate for oysters in both research and commercial production. Best for bucket and bag tek.
- Master’s Mix — 50/50 hardwood pellets and soy hull pellets. Highest yields for sterilized bag culture, and the standard for serious grow rooms.
- Supplemented hardwood sawdust — oak, beech, or maple plus 10–20% wheat or rice bran. Slightly lower yields than masters mix but easier to source in some regions.
- Coffee grounds — works well as a partial substrate when mixed 50/50 with straw or sawdust. Spent grounds from a local café are essentially free, which is why this is a community favorite for budget grows.
- Cardboard — lowest yields, but viable for ultra-budget setups or as a way to rescue a culture.
One specific watch-out: target around 61% moisture for sterilized bags. Wesley from Southwest Mushrooms calls anything wetter “schlog” — over-hydrated substrate that won’t fully colonize and turns into a bacterial contamination factory. Squeeze a handful of mixed substrate; if more than a few drops come out, it’s too wet.
When you’re ready to weigh out your own batches, the substrate calculator pre-fills for masters mix.
Growing methods#
Blue oysters work with almost every cultivation method — except monotub tek. They need significantly more fresh air exchange than a sealed tub provides, and trying to fruit them in one usually produces leggy, malformed clusters. Skip monotub for this species and pick from the methods below.
From a kit#
Best for: absolute beginners, first-time growers, anyone who wants harvest in three weeks with zero substrate prep.
- Order a pre-colonized blue oyster kit from North Spore or Out-Grow.
- Cut a 5-inch X through the plastic at the front of the bag.
- Mist the cut area twice a day with a fine spray bottle — moist but not dripping.
- Stand the bag upright in indirect light at 60–75°F.
- Pins should appear within 5–10 days.
- Harvest by twisting the cluster off at the base just before the caps fully flatten.
Expect first pins in about a week and total time to harvest of 14–21 days from opening the kit.
Bucket tek#
Best for: growers ready to move past kits without buying lab equipment.
- Pasteurize chopped wheat straw — either hot water (160°F for an hour) or cold cement-mixer style with hydrated lime.
- Drain to roughly 65% moisture (squeeze test).
- Mix the straw with grain spawn at about a 5:1 ratio.
- Pack the inoculated straw into a food-grade 5-gallon bucket with quarter-inch holes drilled in a grid pattern.
- Cover the holes with micropore tape during colonization.
- Once the bucket is fully colonized (14–21 days), peel off the tape and move to a humid, well-ventilated area.
- Mist the holes twice daily until fruiting bodies emerge.
Expect first pins 10–14 days after inoculation and total time to harvest around 3–4 weeks.
Bag culture (Master’s Mix)#
Best for: growers ready to invest in sterilization equipment and chase consistent yields.
- Mix 50% hardwood fuel pellets, 50% soy hull pellets, and water to ~61% moisture.
- Load filter-patch grow bags (Unicorn 14A or 3T are the standards).
- Pressure sterilize at 15 PSI for 2.5 hours in a pressure cooker.
- Cool overnight, then inoculate with grain spawn in front of a flow hood or still-air box.
- Incubate at 70–75°F until the block is fully white — then wait an extra 4–5 days. This “over-incubation” trick is widely used by experienced growers and produces firmer blocks and stronger first flushes.
- Cut a 5-inch X in the bag and move to a humid fruiting environment with strong air exchange.
Expect colonization in 14–21 days, pinning 5–7 days after introducing fresh air, and harvest 4–9 days after pinning.
Outdoor bed and log culture#
Best for: growers with a shaded yard or access to fresh hardwood logs.
Blue oysters do well outdoors in temperate climates. For bed culture, layer pasteurized straw and grain spawn in a shaded, mulched area and keep moist. For log culture, drill and inoculate fresh-cut hardwood (oak, poplar, or maple) with sawdust spawn and seal the holes with cheese wax. Outdoor grows are slower (3–6 months to first fruiting) but produce for years with minimal further input — the right call if you have outdoor space and don’t mind the wait.
Fruiting conditions#
This is where blue oysters earn their reputation for being “demanding” once you move past kits. They’re easy to grow — but easy to grow badly.
Temperature. Blue oyster is sold in two strain types: cold blue (fruits at 35–50°F, often used for outdoor winter grows) and warm blue (fruits at 60–85°F, the standard indoor strain). Ohio State Mycology lists 70–75°F as the colonization temperature for both. For most home growers using a typical indoor setup, target 60–75°F during fruiting and you’ll be fine — the quick-reference card above reflects that practical range.
Humidity. Keep humidity at 85–95% during fruiting. A simple grow tent with a humidifier on a timer is enough; for a single bucket or kit on a counter, twice-daily misting works. Below ~80%, pins abort or dry out before they develop into harvestable mushrooms.
Fresh air exchange. This is the single most common failure point for blue oysters. They need significantly more FAE than most other oysters — manual fanning is almost always insufficient at scale. If you’re growing in a sealed environment, you’ll get long stems and tiny caps (the leggy failure mode). The fix is automated air exchange: a small inline fan on a timer pulling fresh air through the chamber for a few minutes every hour. This r/MushroomGrowers thread on aborted blue oyster pins shows several growers reaching the same conclusion.
Light. Indirect natural light or a low-wattage LED on a 12-hour cycle is enough. Total darkness produces deformed clusters; direct sun dries them out.
Cold shock for pigment. If you want the deep cobalt blue color blue oysters are named for, drop your colonized block in the refrigerator for 48 hours before introducing fresh air. The cold triggers fruiting and intensifies the blue pigment in the developing primordia. Without the cold shock you’ll still get mushrooms, just paler ones that fade toward grey as they mature.
Harvest and yield#
When to harvest. Pick blue oysters before the caps fully flatten. The visual cue is simple: caps should still be slightly cupped or curled at the edges. Once they go fully flat or start to upturn, the mushroom has begun releasing spores in earnest — quality drops, shelf life shortens, and you significantly increase the spore load in your grow space.
This is the most important harvest window of any species we cover. Harvest a day early rather than a day late. Experienced growers consistently advise picking blue oysters when caps are still cupped, specifically to limit spore release. Taste and shelf life are also better at this stage.
How to harvest. Twist the entire cluster off at the base in one motion. Don’t cut, and don’t try to pick individual mushrooms. Twisting takes the whole cluster cleanly and leaves the substrate intact for the next flush. A sharp harvest knife is useful for trimming the base block off afterward.
Yield. Expect 1.5–2.5 lbs of fresh mushrooms per 5 lb fruiting block, spread across 2–3 flushes. The first flush is the largest (typically 60–70% of total yield), the second is smaller, and the third is often barely worth the wait. Biological efficiency for masters mix typically lands between 75% and 150% depending on substrate quality, hydration, and strain.
Triggering subsequent flushes. After harvesting the first flush, soak the block in cold water for 4–8 hours, drain, and return it to the fruiting environment. Most blocks will produce a second flush within 7–10 days.
Spore management for indoor grows. Harvest before caps fully flatten and ventilate the room during fruiting — that handles the baseline for a single hobbyist block. When you’re processing a heavy flush or running a dehydrator, do it in a lower-traffic area of the house if you can: a basement, garage, spare room, or anywhere with good airflow. The point isn’t that one block is dangerous; it’s that reducing repeat exposure in your everyday living space is a sensible default. A P100 respirator adds another layer if you want it, and becomes more useful the more volume you’re processing.
A note if you’re scaling toward commercial production. Blue oysters produce significantly heavier spore loads than most other cultivated species. That doesn’t matter much for a hobbyist running one or two blocks, but it compounds fast at commercial volume. There’s a documented case on r/MushroomGrowers where a grower running roughly 100 lbs per week — with in-house dehydration and flushes left to fully open and shed for two days before harvest — developed hypersensitivity pneumonitis serious enough to require hospitalization. The pattern matters: it wasn’t a single block on a counter, it was high-volume production plus drying plus over-mature mushrooms releasing spores in an enclosed space. If your grow looks anything like that, dedicated ventilation, a P100 respirator, and a strict harvest-before-flat policy are non-negotiable.
Flavor, texture, and uses#
Blue oysters have a mild, savory flavor with a faint anise scent when raw — not overpowering, but distinct enough that you’ll notice it the first time you cut into a fresh cluster. Cooked, that anise note disappears and the texture turns meaty and tender, holding shape well in stir-fries, soups, and pasta. They crisp up beautifully when sautéed in butter or fried, and several growers compare the flavor of well-browned blue oysters to seafood — the umami sits in the same family as scallops or oyster meat.
Best cooking methods. Sauté over medium-high heat in butter or oil until the edges crisp. Avoid boiling — they go limp. They also dry well for long-term storage and rehydrate in 15 minutes for soups and risottos.
Medicinal value. Pleurotus mushrooms — including blue oyster — are studied for cholesterol-lowering and dietary health properties attributed largely to the natural statin compound lovastatin. They also contain ergothioneine (a sulfur-containing antioxidant rare in the diet) and beta-glucans (immune-modulating polysaccharides common across edible mushrooms). Concentrations vary by strain and growing conditions — treat the medicinal angle as a bonus, not the reason to grow them. The primary reason is that they taste good and they’re easy.
Storage. Fresh in the fridge: 5–7 days in a paper bag. Dried in airtight jars with desiccant: indefinitely. Freezing raw produces mush; sauté lightly before freezing if you need to store a large flush.
Common problems#
Leggy stems with tiny caps#
The classic FAE failure. Blue oysters need more fresh air exchange than nearly any other cultivated species, and manual fanning is almost never enough. Add an inline fan on a timer pulling air through the fruiting chamber for a few minutes per hour — automated FAE is the only consistent fix.
Aborted pins#
Humidity dropped below ~80%, temperature spiked above 80°F, or both. Pins start forming, then dry out and brown before developing. Fix: raise humidity, drop temperature into the 60–75°F range, and check that your hygrometer is actually accurate.
Spore-related lung irritation#
Blue oysters are heavy spore producers, and a flush left to fully open and shed in an enclosed space can irritate the lungs of sensitive people. Hobbyists growing one or two blocks at a time rarely run into problems with basic precautions. Risk scales fast with production volume — see the commercial scaling note in Harvest and yield if you’re growing past hobby scale. Standard precautions for hobby grows: harvest before caps flatten, ventilate the grow area, and process heavy flushes or dehydrate dried mushrooms in a lower-traffic part of the house when you can.
Bacterial contamination (“schlog”)#
Caused by substrate that’s too wet — usually above 65% moisture. The block develops slimy, bad-smelling patches that won’t colonize. Fix: target 61% moisture next time, and squeeze-test before bagging.
Wet rot in liquid culture grain bags#
A common issue specifically when injecting liquid culture into pre-made grain bags. The bags retain too much condensation and bacteria outcompete the mycelium. Switch to grain spawn from a reputable supplier, or use solid agar transfers instead of liquid culture for grain inoculation.
Where to buy blue oyster spawn#
Two suppliers in our directory currently carry blue oyster spawn, cultures, or kits.
North Spore has the widest gourmet selection in North American home cultivation. Their Spray & Grow blue oyster kit is the most beginner-friendly entry point we’ve found, and they carry grain spawn, sawdust spawn, plug spawn, and liquid culture for growers ready to scale. Pricing runs mid-to-premium, but shipping is fast and their YouTube channel doubles as a free growing course.
Out-Grow is the go-to for liquid cultures and DIY-focused growers. Smaller scale than North Spore but reliably good prices on syringes and grain spawn, and they stock multiple blue oyster strains including the columbinus variety and a couple of commercial isolates.
A few suppliers we’d recommend if you’re outside the US or hunting for specific strains: Field & Forest Products is the standard for plug spawn if you want to inoculate logs, and Mossy Creek Mushrooms is well-regarded among commercial growers for their “King Blue” high-yield genetics. Both are on our shortlist to add as full directory entries — check back as the supplier index expands.
Recommended equipment#
For kit growing, you don’t need anything beyond a fine-mist spray bottle and a hygrometer.
For bucket tek, you’ll need a food-grade 5-gallon bucket, a power drill with a quarter-inch bit, and either a large pot for hot-water pasteurization or hydrated lime for cold pasteurization.
For bag culture, the substrate sterilization step requires a pressure cooker — the Presto 23-quart is the standard beginner choice, and the All American 921 is the long-term workhorse upgrade. You’ll also need filter-patch grow bags (Unicorn 14A or 3T), an impulse sealer, and either a flow hood or a still-air box for clean inoculation.
A few universal essentials regardless of method: a digital hygrometer for monitoring humidity, 70% isopropyl alcohol for sterile work, a sharp harvest knife, and — for indoor grows specifically — a P100 respirator for handling heavy flushes or dried mushrooms.
Related guides#
- How to Grow Mushrooms at Home — Beginner Guide
- Substrate Calculator — pre-fill for masters mix or pasteurized straw
- Pressure Cooker Buying Guide — sterilization for bag culture
- Lion’s Mane Growing Guide — natural next species after you’ve mastered oysters
- Shiitake Growing Guide — for log inoculation overlap